Quick Start
Prerequisites
Before using CodeVista: AI Coding Assistant, make sure the following requirements are met:
| Requirement | Details |
|---|---|
| Visual Studio Code | Latest stable version recommended |
| CodeVista Account | A valid corporate CodeVista account |
| CodeVista Extension | Download the .vsix package from the CodeVista website or obtain it from the CodeVista team |
| Network Access | Access to the CodeVista service and Keycloak authentication portal |
| Disk Space | Approximately 300 MB of free space |
This guide is for installing CodeVista from a VSIX package. If CodeVista is available through your organization's internal Marketplace, you can install it directly from the Extensions view.
Installation
Follow the steps below to install the CodeVista extension manually using the provided VSIX package.
Step 1: Open Install from VSIX
- Open Visual Studio Code.
- Open the Extensions view by clicking the Extensions icon in the Activity Bar (macOS:
Cmd + Shift + X— Windows/Linux:Ctrl + Shift + X). - Click the More Actions (
...) button at the top of the Extensions panel. - Select Install from VSIX...
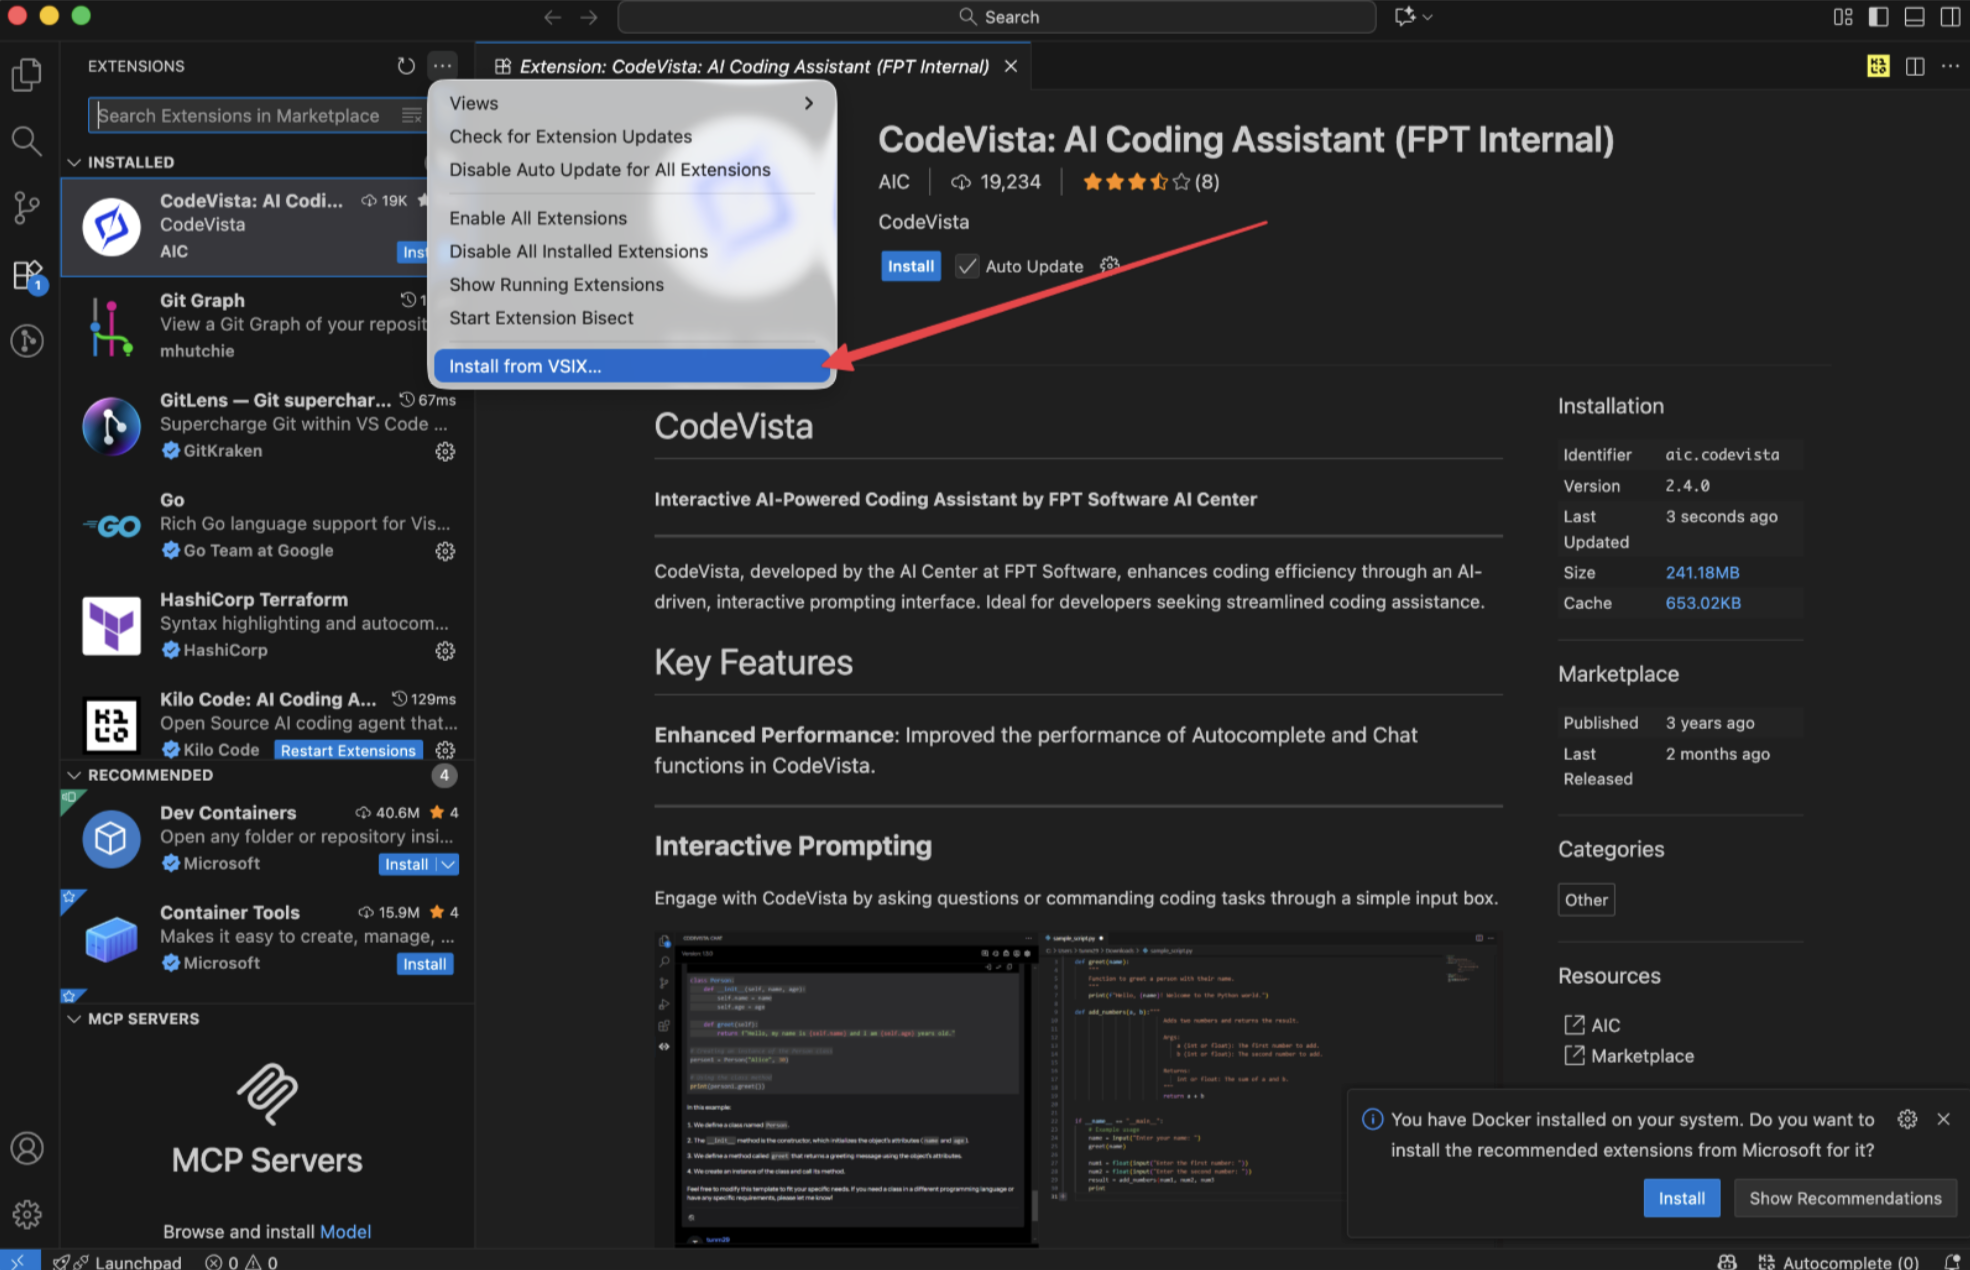
Step 2: Select the CodeVista VSIX Package
In the file browser:
- Navigate to the folder containing the CodeVista installation package, such as Downloads or Desktop.
- Select the CodeVista
.vsixfile. - Click Install to begin the installation.
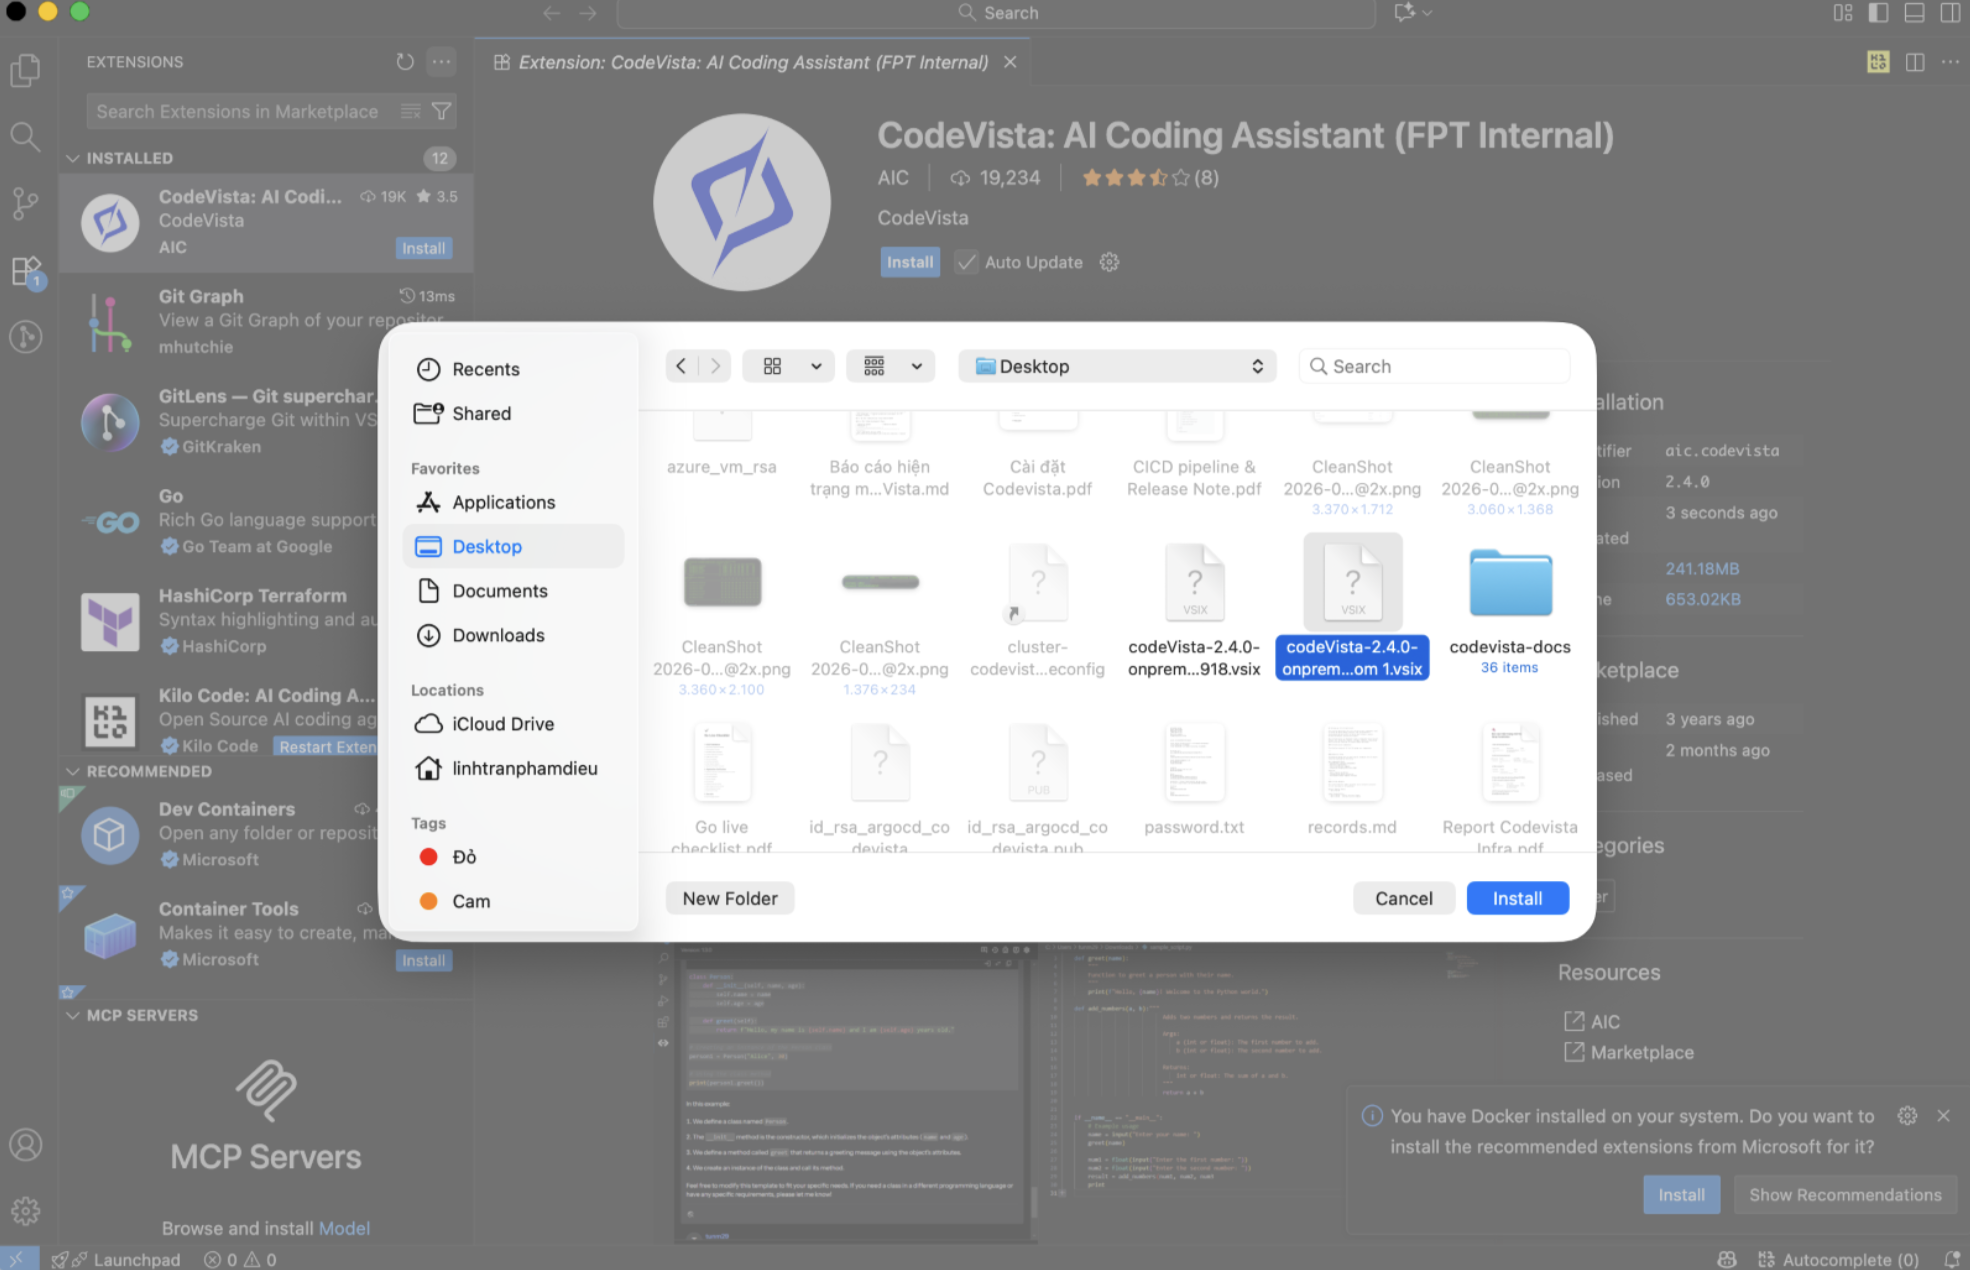
Step 3: Reload Visual Studio Code
After the installation is complete:
- Click the Refresh icon in the Extensions panel to reload the Extensions view.
- If prompted, click Reload Window or restart Visual Studio Code.
- Wait for CodeVista to initialize.
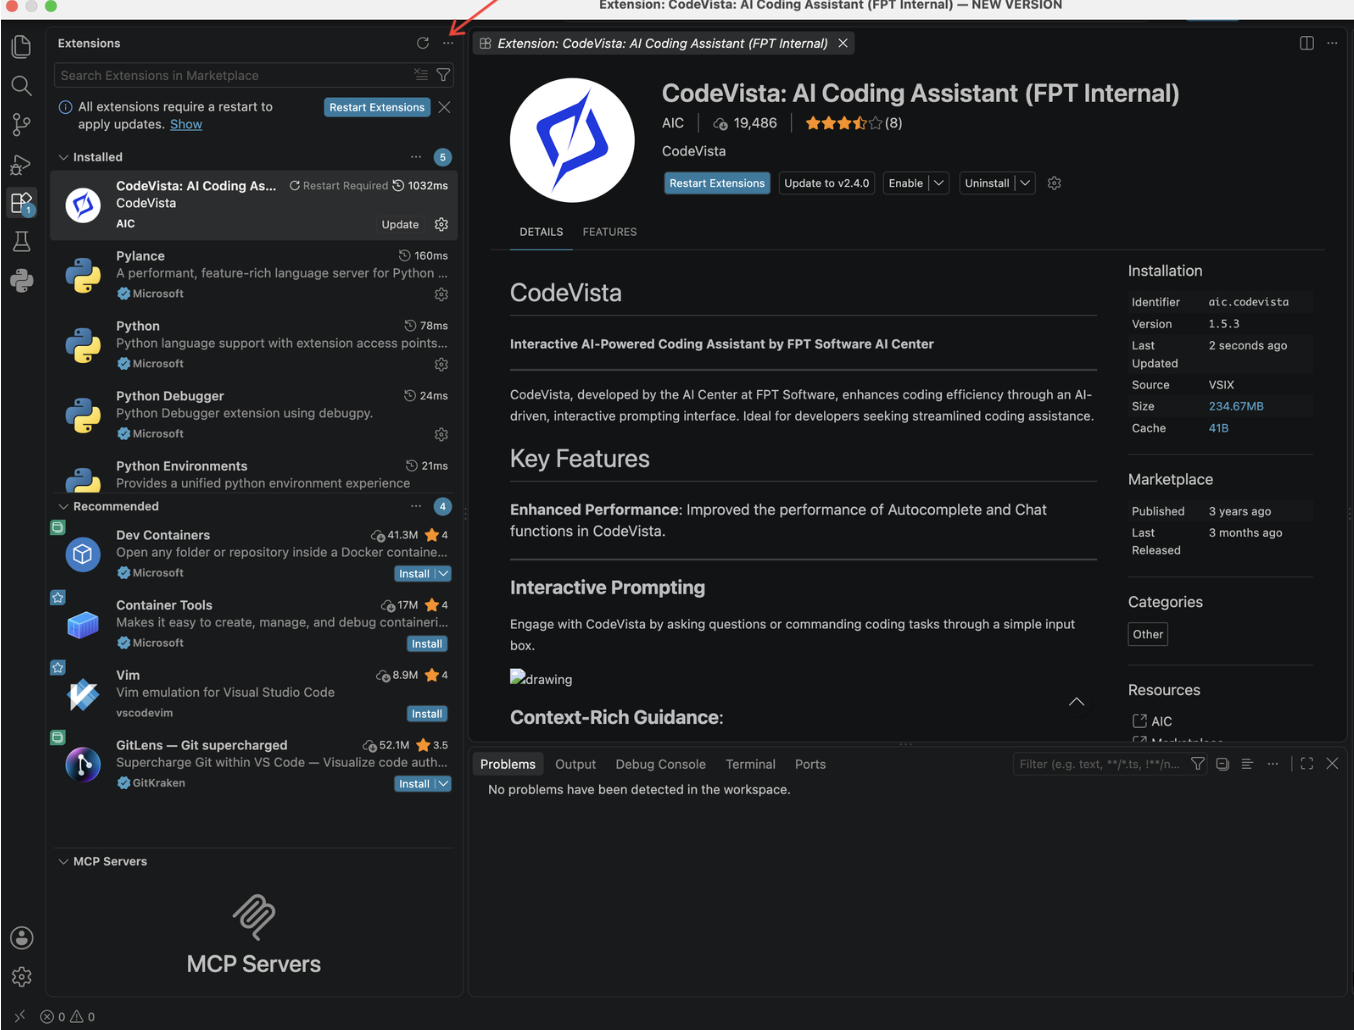
Step 4: Verify the Installation
Open the CodeVista extension page in Visual Studio Code and verify that:
- The extension identifier is
aic.codevista. - The installed version is displayed correctly.
- Disable and Uninstall buttons are available, indicating that the extension is installed and active.
- The CodeVista icon appears in the Activity Bar.
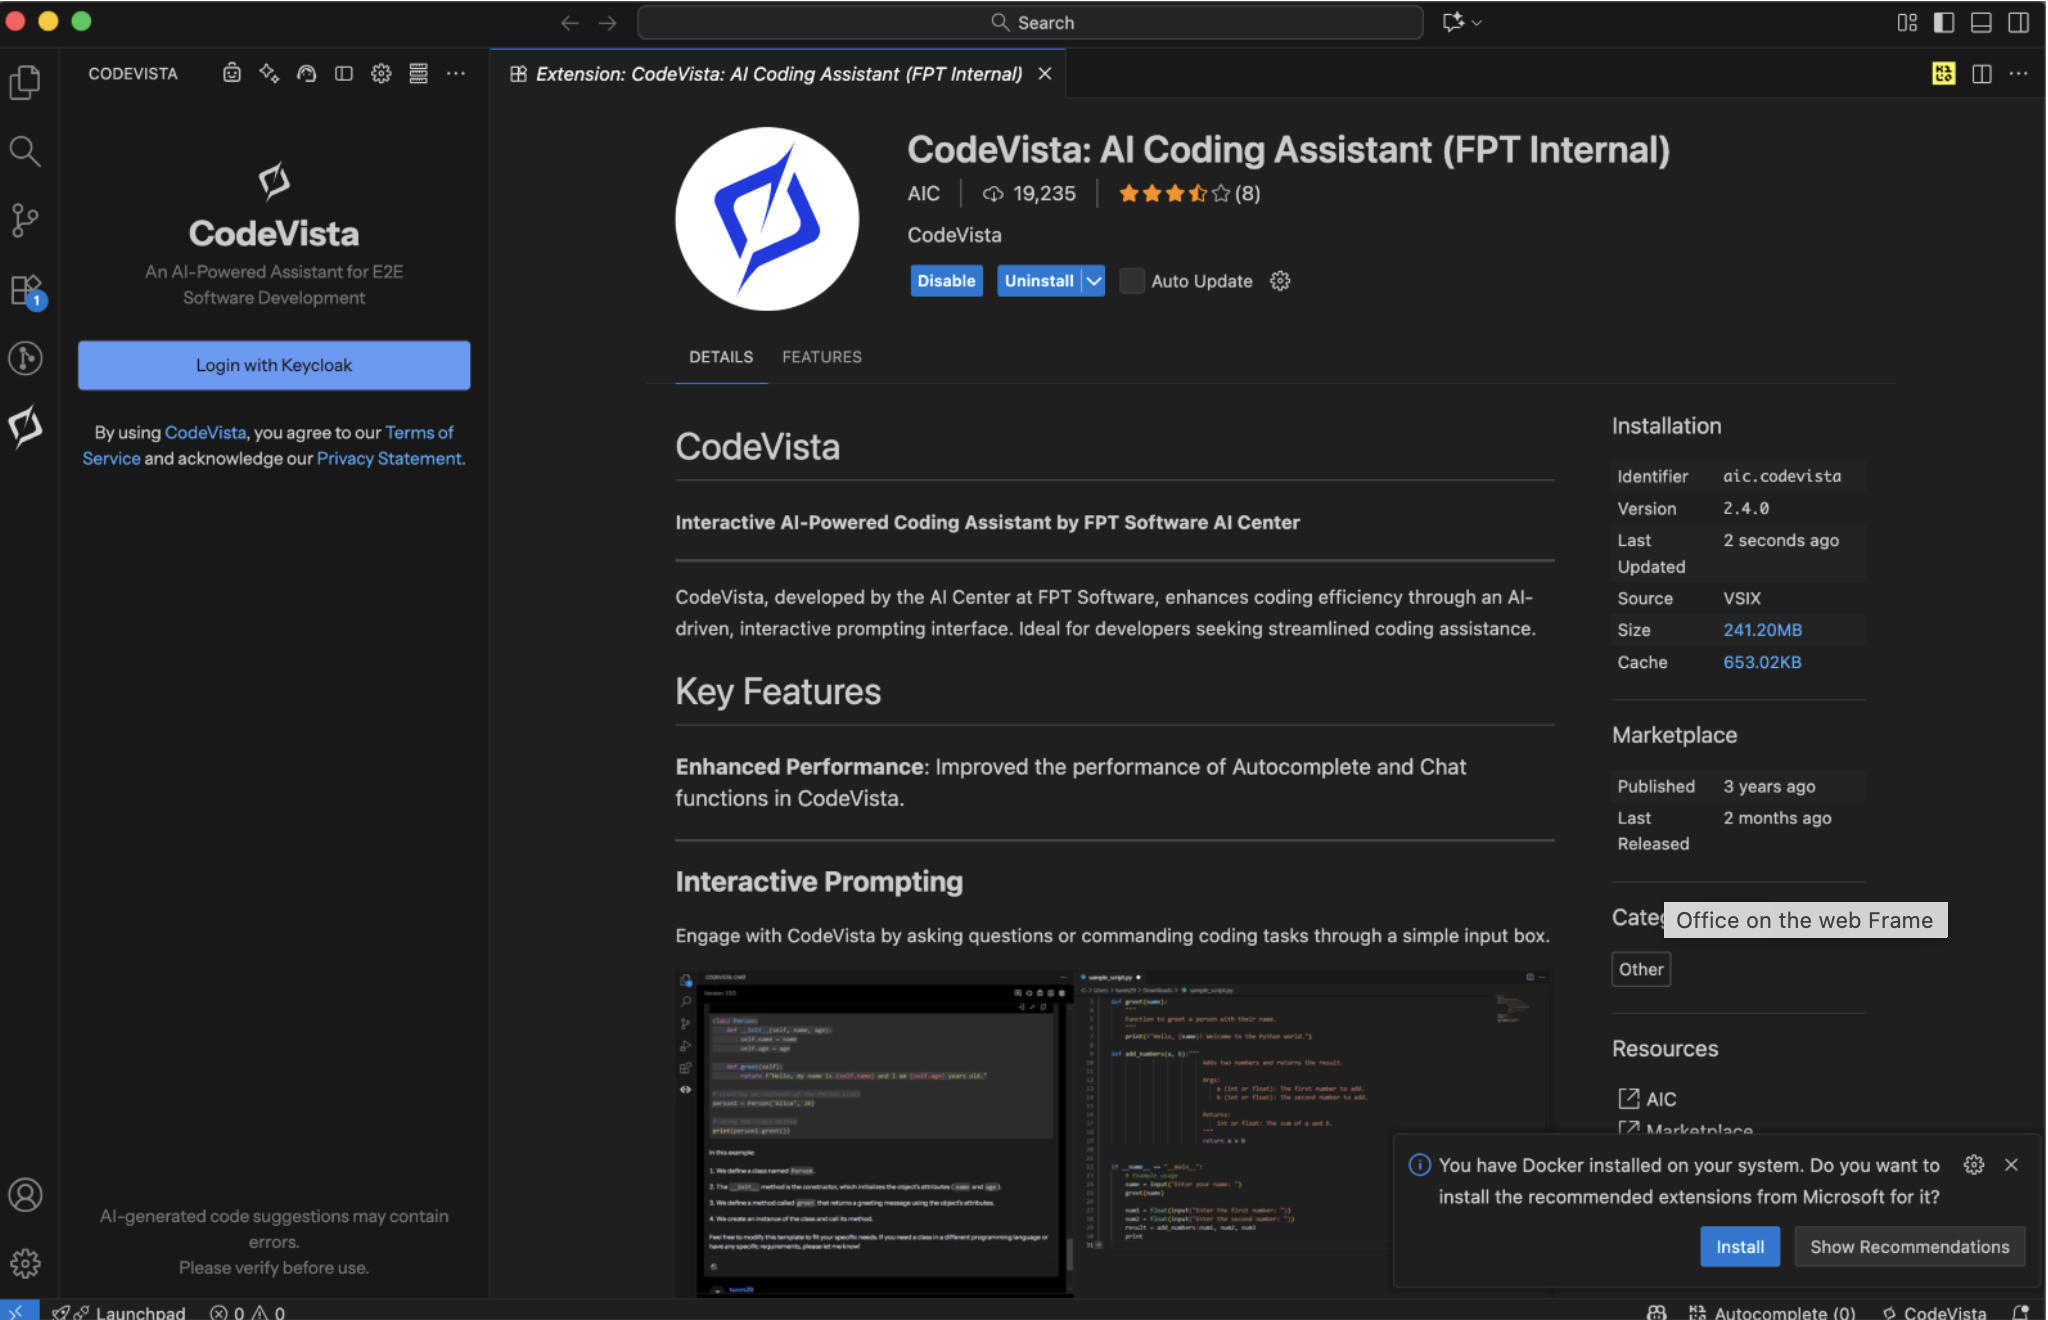
Once the CodeVista icon appears in the Activity Bar, the installation is complete and you can proceed to sign in and configure CodeVista.
Signing In with Keycloak
CodeVista uses Keycloak Single Sign-On (SSO) for authentication. Follow the steps below to sign in and connect the CodeVista extension to the service.
Step 1: Start the Login
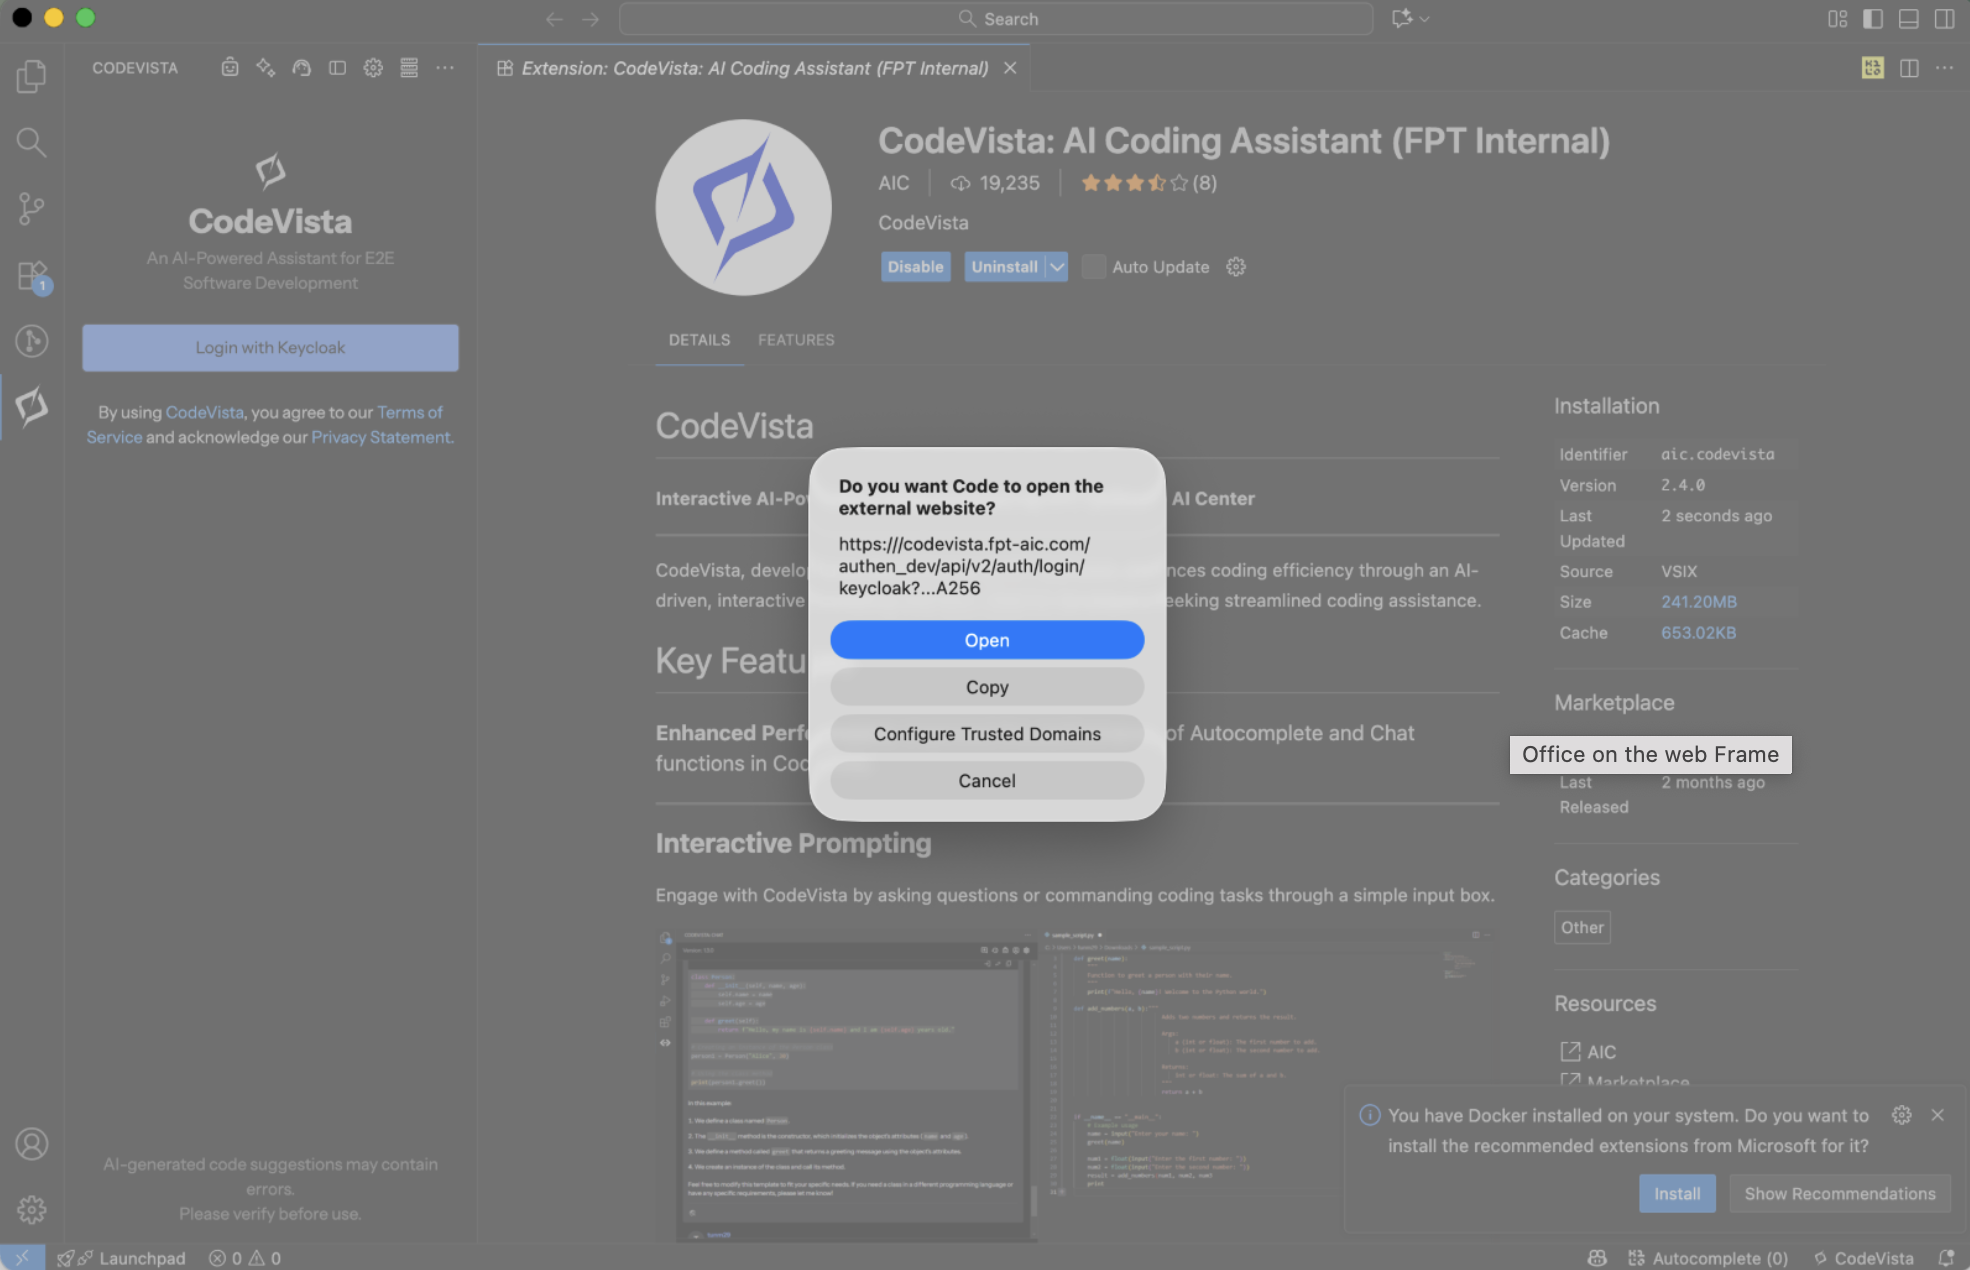
- Click the CodeVista icon in the Visual Studio Code Activity Bar.
- Click Login with Keycloak.
- Visual Studio Code will ask for permission to open the CodeVista authentication page in your browser.
- Click Open to continue.
Step 2: Enter Your Credentials
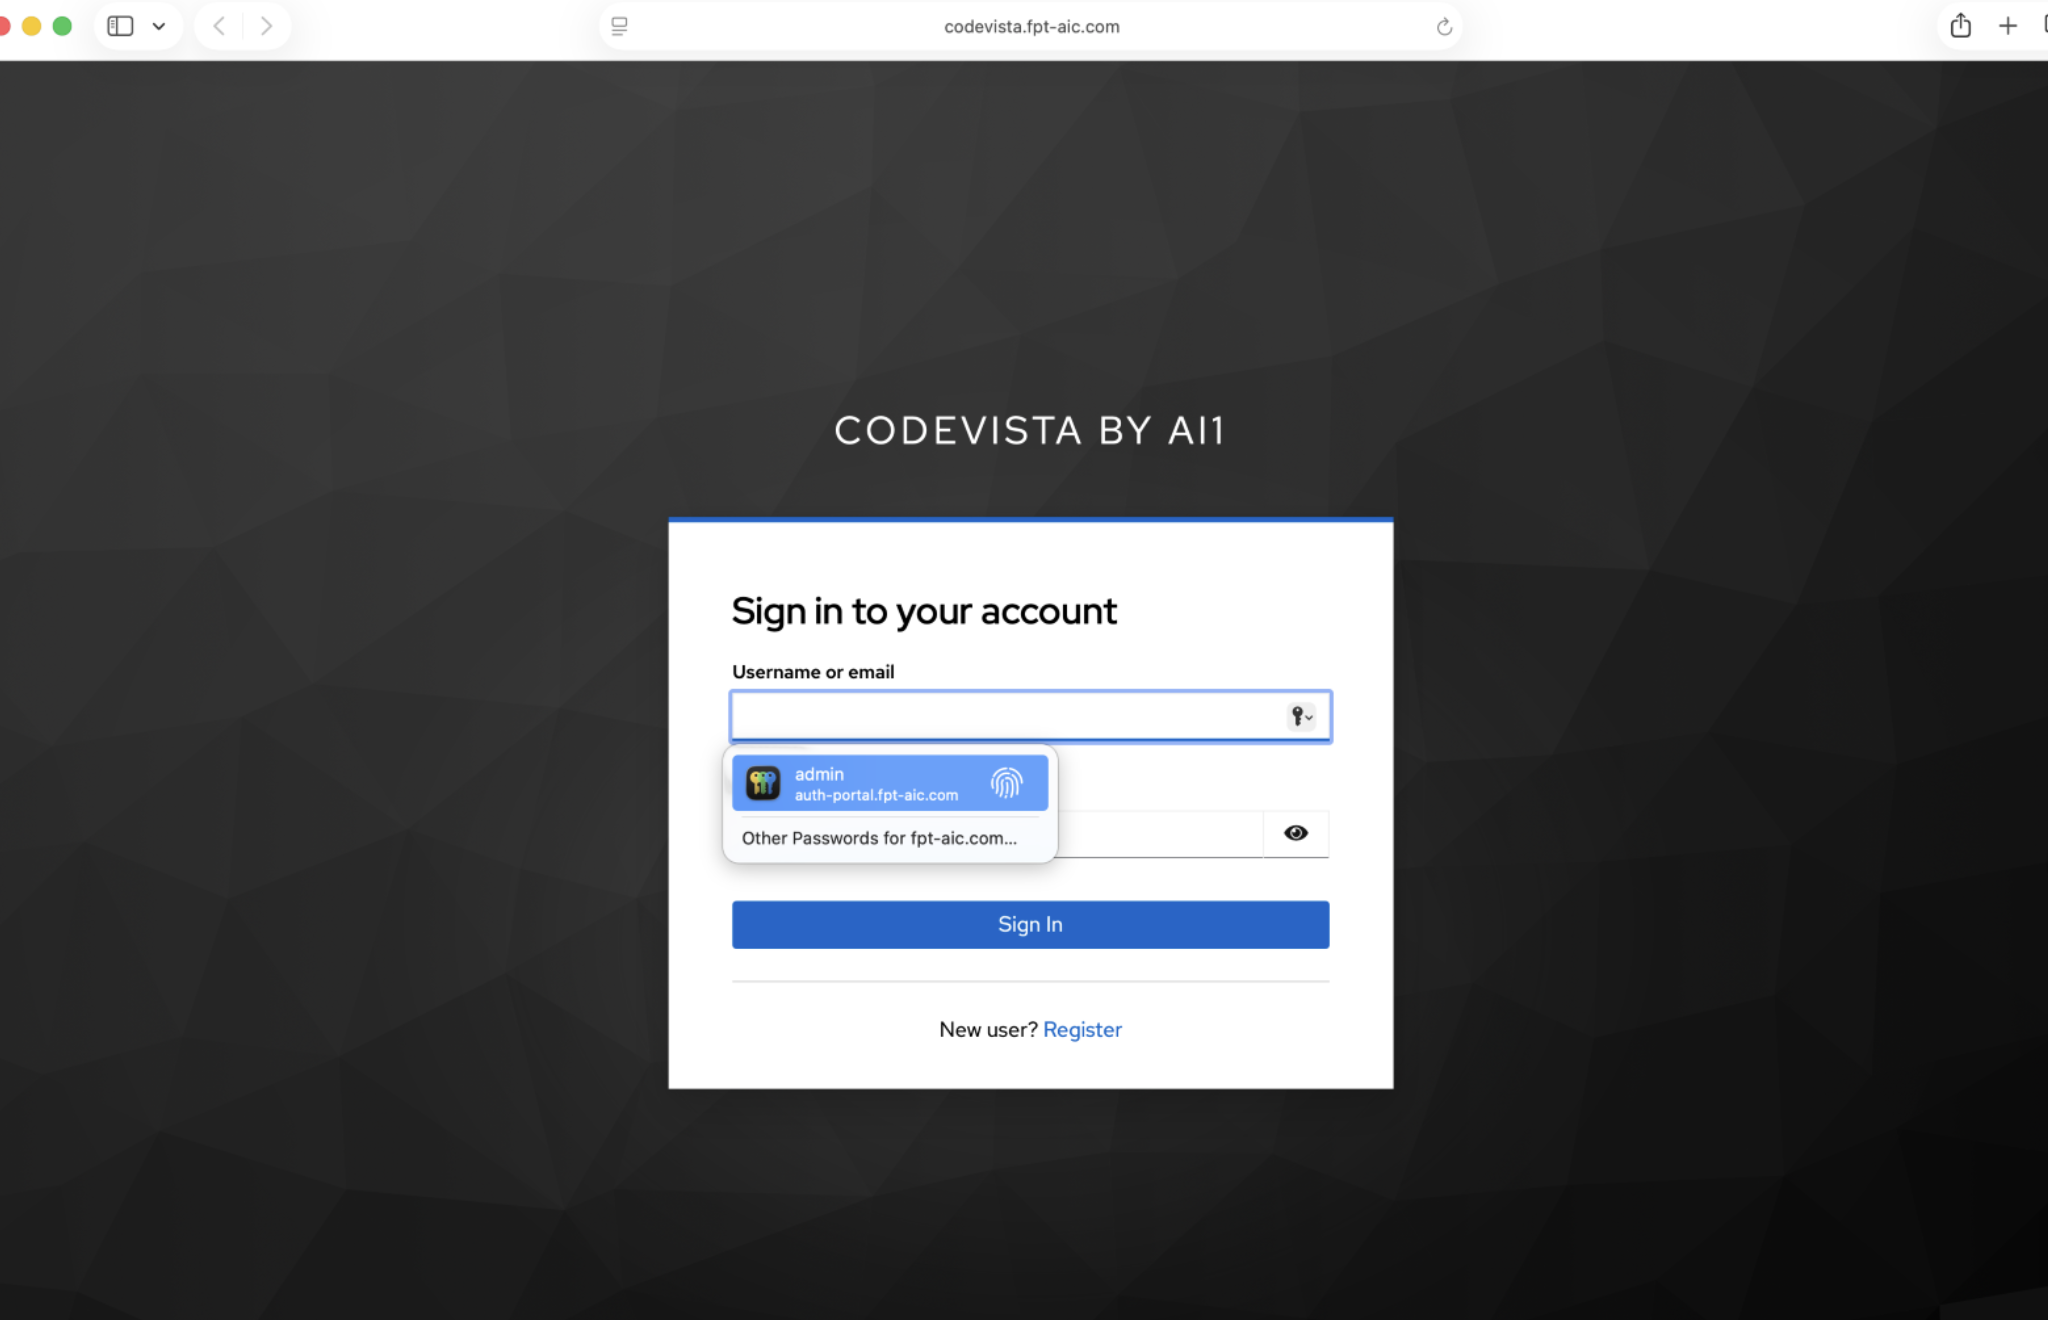
The browser opens the CODEVISTA BY AI1 sign-in page.
- Enter your username or email address.
- Enter your password.
- Click Sign In.
If your browser has saved your CodeVista credentials, you can select the saved account to sign in more quickly.
If you do not have an account, select Register and follow the registration instructions.
Step 3: Return to Visual Studio Code
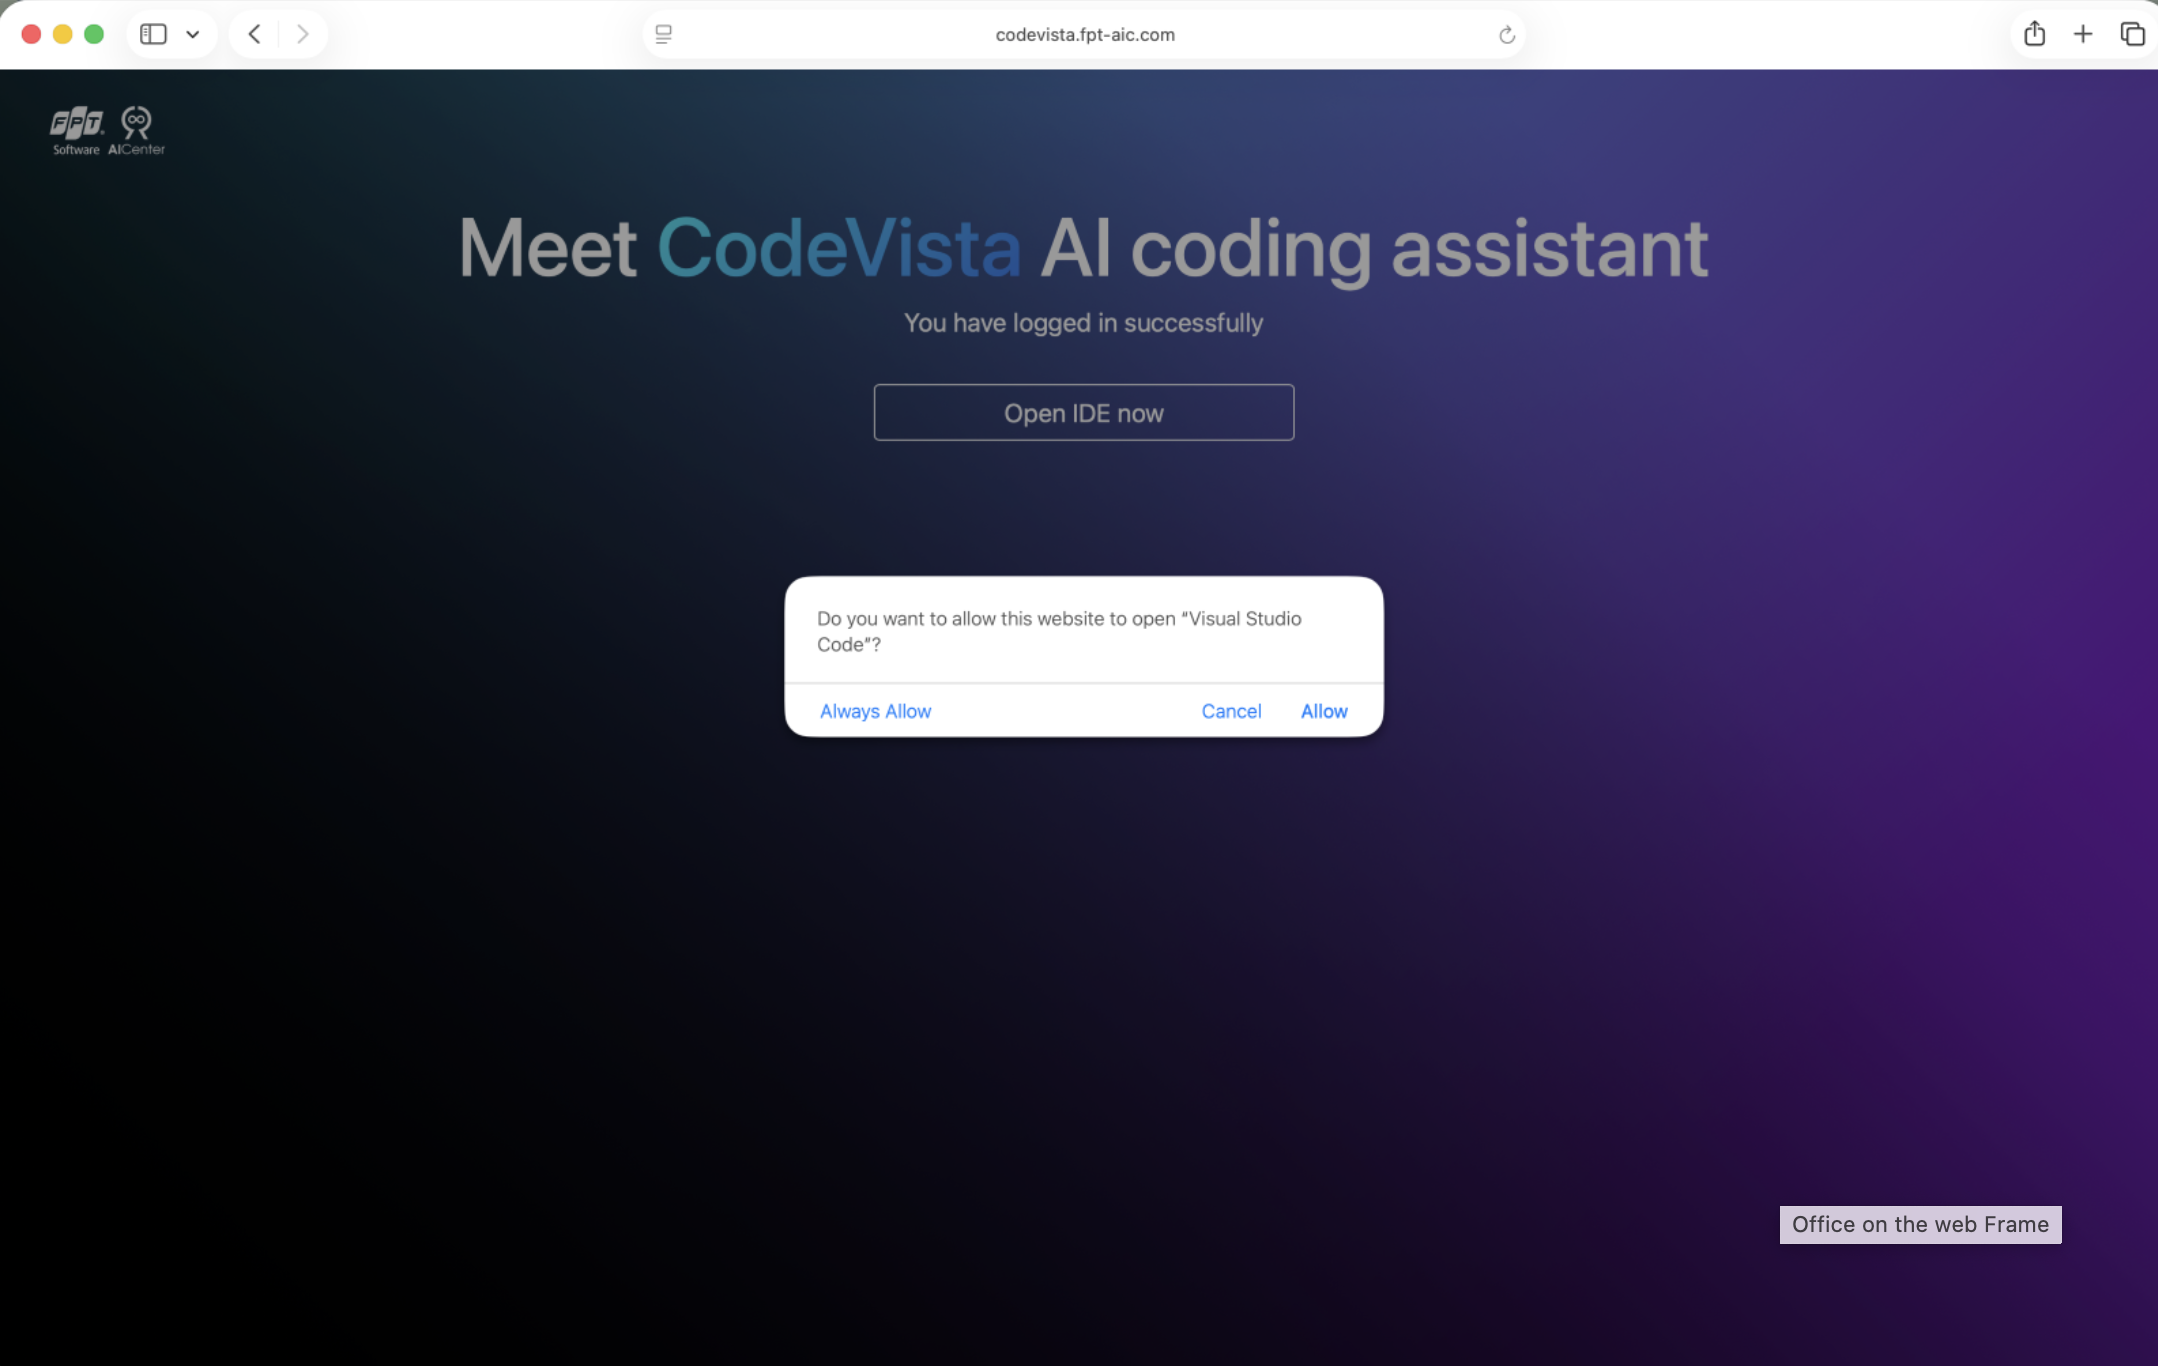
After successful authentication, the browser displays the message:
You have logged in successfully.
- Click Open IDE now.
- Your browser or operating system may ask for permission to open Visual Studio Code.
- Click Allow to continue (you may select Always Allow if you do not want to see this confirmation again).
- Visual Studio Code returns to focus, and the CodeVista panel displays your authenticated session.
If Visual Studio Code does not return to the foreground automatically, switch back to it manually. The Login with Keycloak button should no longer appear, indicating that you are successfully signed in.
Quick Troubleshooting
| Issue | Resolution |
|---|---|
| Install from VSIX... is not visible | Open the Extensions view and use the ... menu at the top of the panel |
| Installation takes a long time | The VSIX package is large. Check the VS Code notification area for progress |
| CodeVista does not appear after installation | Refresh Extensions or run Developer: Reload Window |
| Browser does not open during login | Check your default browser and network access to the CodeVista authentication service |
| Login succeeds but VS Code does not reopen | Click Open IDE now, approve the browser prompt, then return to VS Code manually |
| Login fails or account not found | Verify your account credentials or contact the CodeVista administrator |
| Being redirected to Login panel | Refer to this KB for more details: How to fix login issues in CodeVista for VS Code |
Support & Resources
- CodeVista Website: https://codevista.ai4code.app/
- CodeVista fanpage: FPT Place
- Publisher: FPT Software AI Center
For account access, installation issues, or bug reports, contact your CodeVista administrator or the CodeVista support team.